Construction contractors, project managers, site supervisors, or skilled tradespersons looking to perfect their drywall finishing skills, will find all that you need to know in this blog. Drywall finishing is a crucial step in any home improvement or construction project, transforming rough walls into smooth, professional surfaces ready for paint or wallpaper.
In this comprehensive guide, we’ll dive into essential drywall finishing tips for 2025, covering everything from mudding drywall and sanding techniques to choosing the right drywall tape types. Let’s get started on achieving that flawless finish that your clients yearn for!
Understanding Drywall Finishing
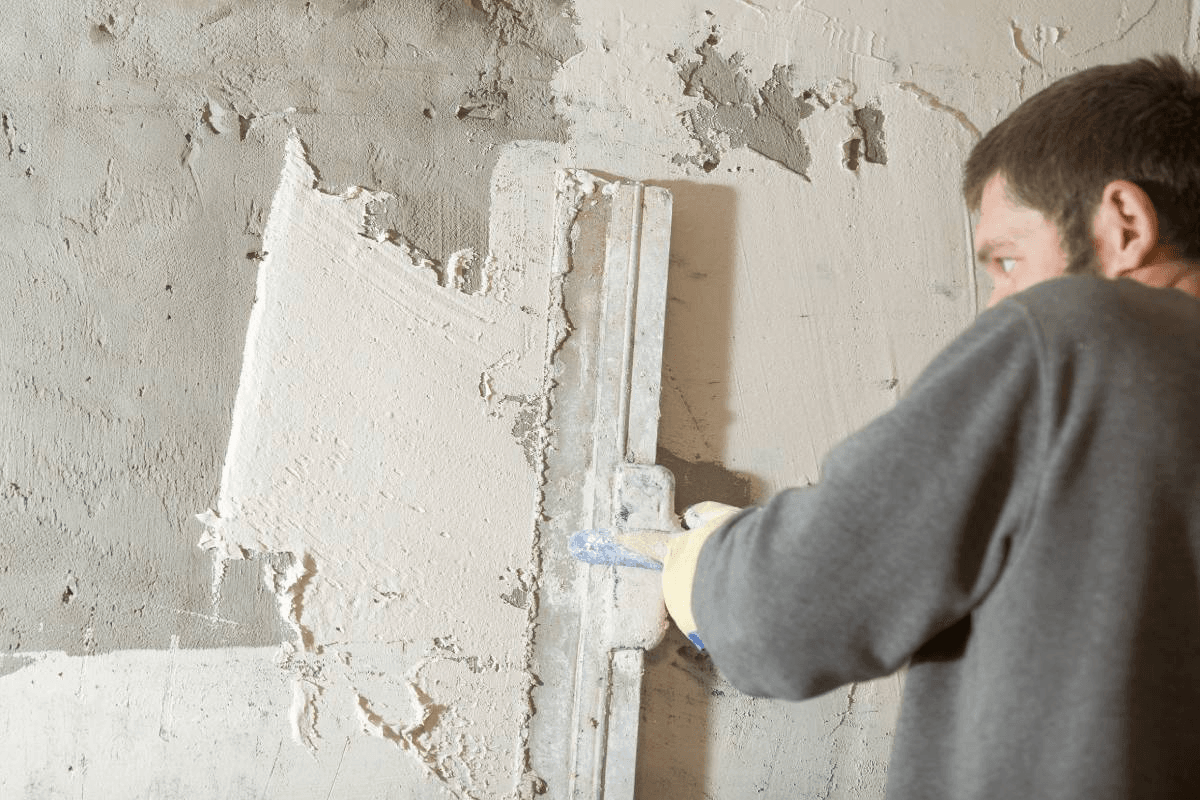
Drywall finishing isn’t just about slapping on some mud and calling it a day. It’s an art that requires precision, the right tools, and a bit of patience. Whether you’re working on a small renovation or a large-scale construction project, mastering this skill can save time, reduce costs, and elevate the quality of your work.
Why Drywall Finishing Matters
A well-finished drywall surface is the foundation of a polished interior. Poor finishing can lead to visible seams, cracks, or uneven textures that detract from the overall aesthetic of a space. Beyond looks, proper finishing enhances durability, preventing issues like cracking or peeling over time.
According to the U.S. Census Bureau, over 60% of home improvement projects in 2023 involved interior wall updates, highlighting the importance of skills like drywall finishing for contractors and tradespeople.
Tools Needed for Drywall Finishing
Before diving into the process, ensure you have the right tools on hand. Here’s a quick list of essentials:
Taping knives (6-inch and 12-inch): For applying and smoothing joint compound.
Mud pan: To hold and mix joint compound.
Sanding blocks or pole sanders: For smoothing dried compound.
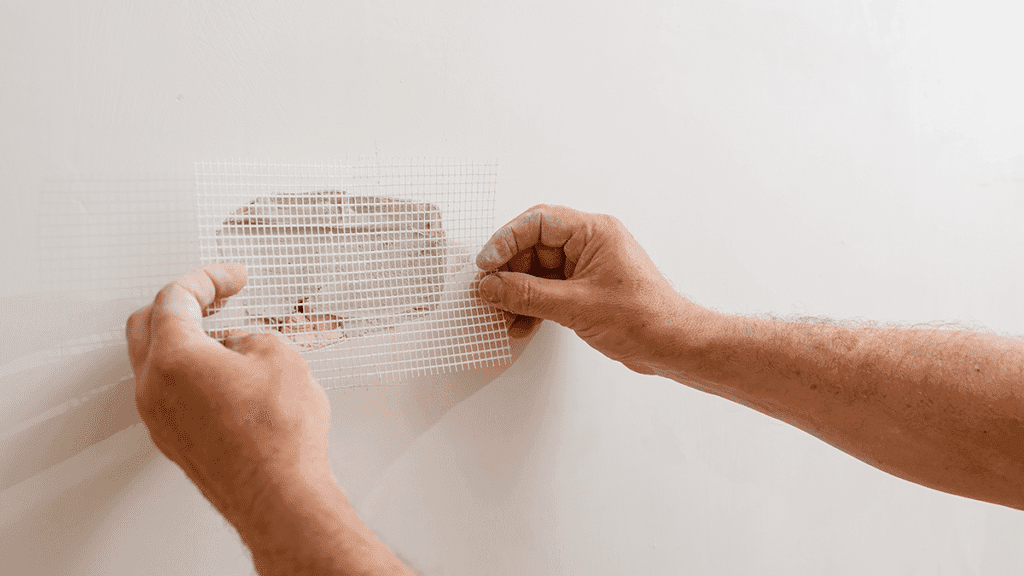
Drywall tape (paper or mesh): To cover seams and joints.
Joint compound (mud): Available in lightweight or all-purpose varieties.
Dust mask and goggles: For safety during sanding. Having these tools ready will streamline your workflow and ensure a professional result.
Tips for Mudding Drywall
Mudding a drywall is where the magic begins to start. This process involves applying joint compound to seams, corners, and screw holes to create a seamless surface. Let’s break it down for you.
Choosing the Right Joint Compound
Not all joint compounds are created equal. Lightweight compounds are easier to sand and ideal for final coats, while all-purpose compounds are more durable and better for initial layers or repairs. For most projects, starting with an all-purpose compound for the first coat and switching to lightweight for finishing works great. Pro tip: Check the drying time on the product label—some compounds set faster, which can be a game-changer for tight project timelines.
Applying the First Coat
Here’s a step-by-step guide to applying your first coat of mud:
Prepare the surface: Ensure the drywall is clean and free of dust or debris.
Apply tape to seams: Press drywall tape over joints using a thin layer of compound as adhesive.
Spread the compound: Use a 6-inch taping knife to apply a thin, even layer over the tape, feathering the edges to avoid ridges.
Cover fasteners: Dab compound over screw or nail holes, and don’t forget to smoothen it out.
Let it dry: Allow 24 hours for drying before sanding or adding another coat. Expert drywall finisher John Smith notes, “The first coat doesn’t need to be perfect—it’s about building a base. Focus on even coverage rather than smoothness.”
Avoiding Common Mudding Mistakes
Newbies often make errors like applying too much compound, leading to excessive sanding, or not feathering edges, which creates visible lines. To avoid such issues, use thin layers and work in small sections. Also, resist the urge to rush—proper drying between coats prevents cracking.
Sanding Drywall for a Smooth Finish
Sanding is where your drywall starts to look truly professional. But timing and technique are key.
When to Sand Drywall
Sand after each coat of compound has fully dried, typically that’s 24 hours. Most projects require 2-3 coats, with light sanding between each to remove imperfections. Avoid over-sanding the first coat—focus on smoothing high spots rather than trying to achieve a perfect finish until the final layer.
Techniques for Effective Sanding
You’ve got two main options: sanding blocks for small areas or pole sanders for larger surfaces. For efficiency, many contractors prefer power sanders with dust collection systems, especially for big jobs. Use a 120-150 grit sandpaper for initial sanding and then switch to 220 grit for the final run. Work in a circular motion to avoid grooves, and always check your progress with a bright light to spot uneven areas.
Safety Tips for Sanding
Sanding creates a lot of fine dust, which can be harmful if inhaled. Always wear a dust mask and safety goggles. If possible, use a shop VAC with a drywall sanding attachment to minimize mess. Proper ventilation is also key—open windows or use fans to keep the air clear.
Exploring Drywall Tape Types
Drywall tape reinforces seams and prevents cracking, but choosing the right type is critical for a lasting finish.
Paper vs. Mesh Tape
Paper Tape: Traditional and cost-effective, paper tape is ideal for flat seams and inside corners. It requires a bedding layer of compound to adhere properly but offers a strong hold when applied correctly.
Mesh Tape: Self-adhesive and easier to apply, mesh tape is great for quick repairs or outside corners. However, it’s less durable than paper tape and may require more compound to cover its texture. For most professional projects, paper tape is the go-to choice for long-term durability.
Applying Drywall Tape Correctly
Here’s how to apply tape like a pro:
Prepare the seam: Apply a thin layer of joint compound over the joint.
Position the tape: Press the tape into the compound, ensuring it’s centered over the seam.
Embed the tape: Use a taping knife to smooth the tape and remove air bubbles.
Cover with compound: Apply a second thin layer of compound over the tape, feathering the edges. Take your time with this step—poorly applied tape can lead to cracks or bubbling down the line.
Advanced Finishing Techniques
Ready to take your drywall game to the next level? These advanced techniques can set your work apart.
The 5 Levels of Drywall Finishing
Drywall finishing is categorized into five levels, each suited to different project needs:
Level 1: Basic finishing for temporary spaces—tape and minimal compound.
Level 2: Tape and one coat of compound, suitable for garages or warehouses.
Level 3: Two coats of compound with light sanding, ideal for spaces with textured finishes.
Level 4: Three coats with thorough sanding, common for painted walls in homes. Choose the level based on the project’s visibility and budget—most residential projects aim for Level 4.
Level 5: The highest quality, involving a skim coat for a perfectly smooth surface, often used in high-end spaces.
Texturing Drywall
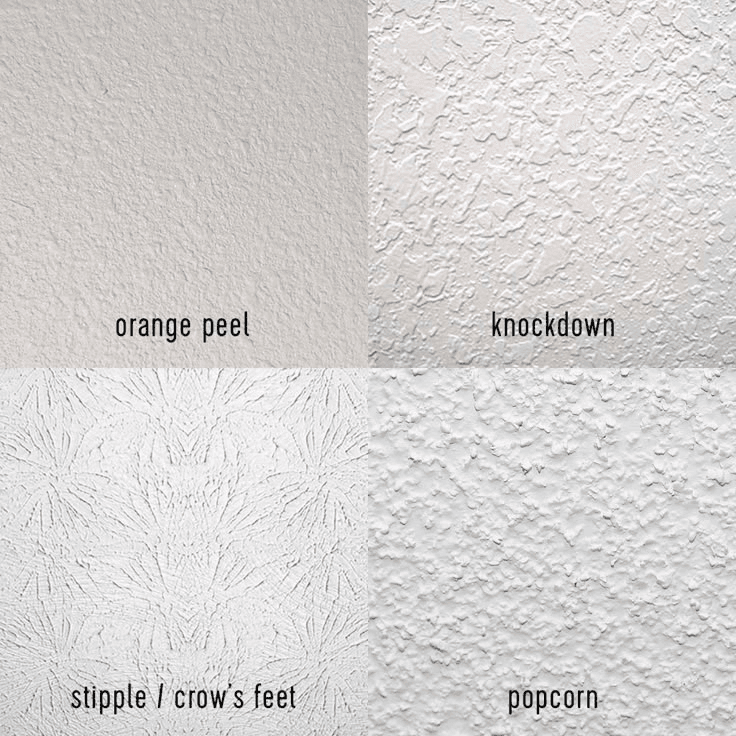
Texturing adds character to walls and can hide minor imperfections. Popular textures include knockdown, orange peel, and popcorn. To achieve a knockdown texture, for example, apply compound with a trowel and lightly “knock down” the peaks with a knife after it partially dries. Experiment on scrap drywall first to perfect your technique.
Conclusion
Mastering drywall finishing takes practice, but with these tips on mudding drywall, sanding techniques, and choosing the right drywall tape types, you’re well on your way to achieving amazing results.
Start with small projects to build confidence, and don’t rush the process—patience pays off with a flawless finish. Whether you’re a contractor streamlining a project or a tradesperson looking to upskill, these strategies will help you deliver top-notch work every time.
Key Takeaways:
Use the right joint compound for each stage of mudding.
Sand lightly between coats for a smooth finish, prioritizing safety with masks and goggles.
Choose paper tape for durability or mesh tape for quick fixes.
Understand there are 5 levels of drywall finishing to match project needs.
Practice texturing on scrap material before applying it to walls.
FAQ
1. What is the best way to finish drywall?
The best way involves applying multiple thin coats of joint compound, using proper taping techniques, and sanding between coats for a smooth finish. Aim for at least a Level 4 finish for most painted walls.
2. Do you sand after every coat of drywall?
Yes, light sanding after each coat removes imperfections and prepares the surface for the next layer. Avoid over-sanding early coats to prevent damaging the tape or paper.
3. What are the 5 levels of drywall finishing?
They range from Level 1 (basic taping) to Level 5 (perfectly smooth with a skim coat), with each level increasing in quality and labor for different project needs.
4. Is it better to sand or sponge drywall mud?
Sanding is more precise for achieving a smooth finish, especially for painted walls. Sponging works for textured finishes or minor touch-ups but can leave an uneven surface.
5. What tools are essential for drywall finishing?
Key tools include taping knives, a mud pan, sanding blocks or pole sanders, drywall tape, joint compound, and safety gear like dust masks and goggles.
